Step 1 - Open Control Panel, click on User Accounts, make sure that View by is on Category:

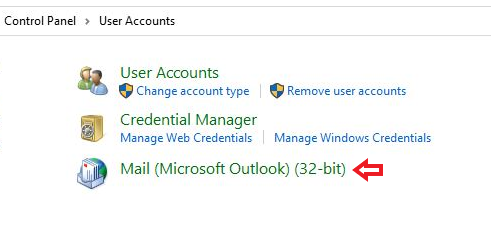
Step 2 - Select Mail as shown below:
Step 3 - Proceed to Email Accounts:

Step 4 - Click on New... to start setup of your email account:

Step 5 - Select the Manual setup or additional server types option and click on Next:

Step 6 - Select POP or IMAP and click on Next:

Step 7 - Server & Logon Information can be requested from Western Cloud, enter the settings into their respective fields, an example is shown below. At the Deliver new messages to section you can either browse and select an already existing datafile or choose to create a new one and when done click on More Settings:

Step 8 - Proceed to the Outgoing Server tab and tick My outgoing server requires authentication and select Use same settings as my incoming mail server:

Step 9 - Enter the Incoming & Outgoing Server Port Numbers as specified in the mail details we provided you, select SSL/TLS as the encryption method, when done you can close the window by clicking on OK:

Step 10 - You are almost done! Click on Next and wait for the Account Settings Test to finish and then select Finish to complete the setup:


