Add your new site to our site builder.
This guide will help you from start to finish to get your new website up and running.
Step 1:
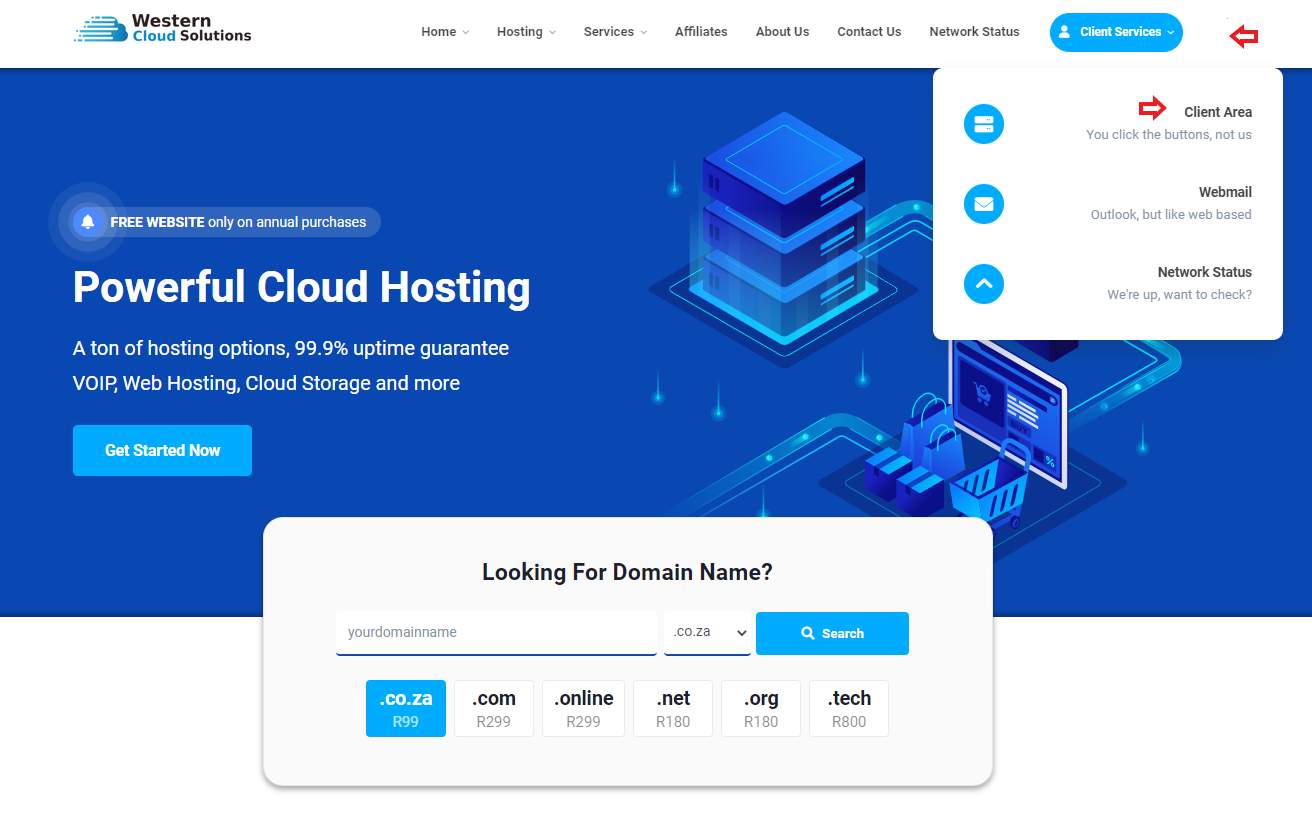
Locate the “Client Services” in the header of Western Cloud Solutions, it will be on the right hand side of your screen, then when you hover over it click on “Client Area”
Step 2:
Log into the “Secure Client Login” and proceed to your dashboard where your domain will be listed.

Step 3:
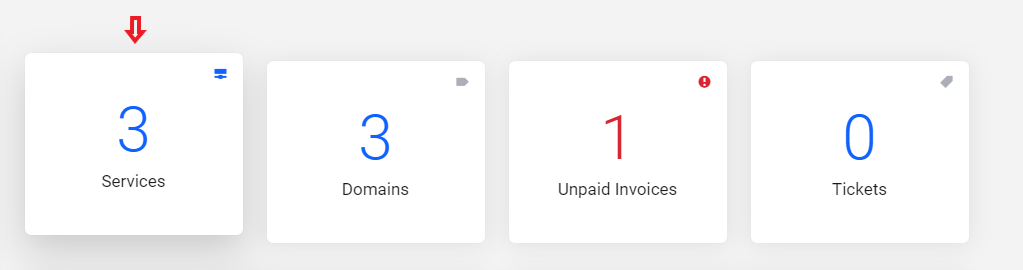
Locate the "Services" block and proceed to click on it, then you will be taken to your domains.
Step 4:
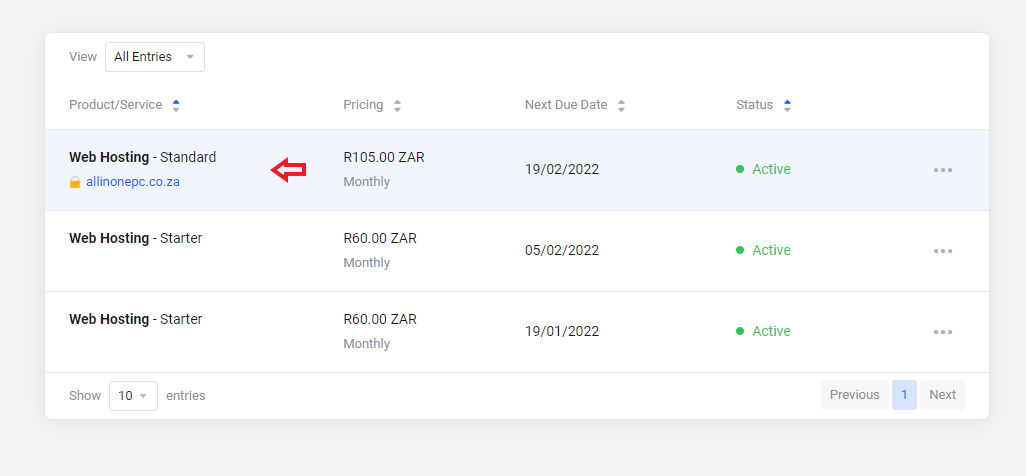
Proceed to click on your domain this will take you to the new window where you are going to look for the Direct Admin block as explained in step 5.
Step 4:
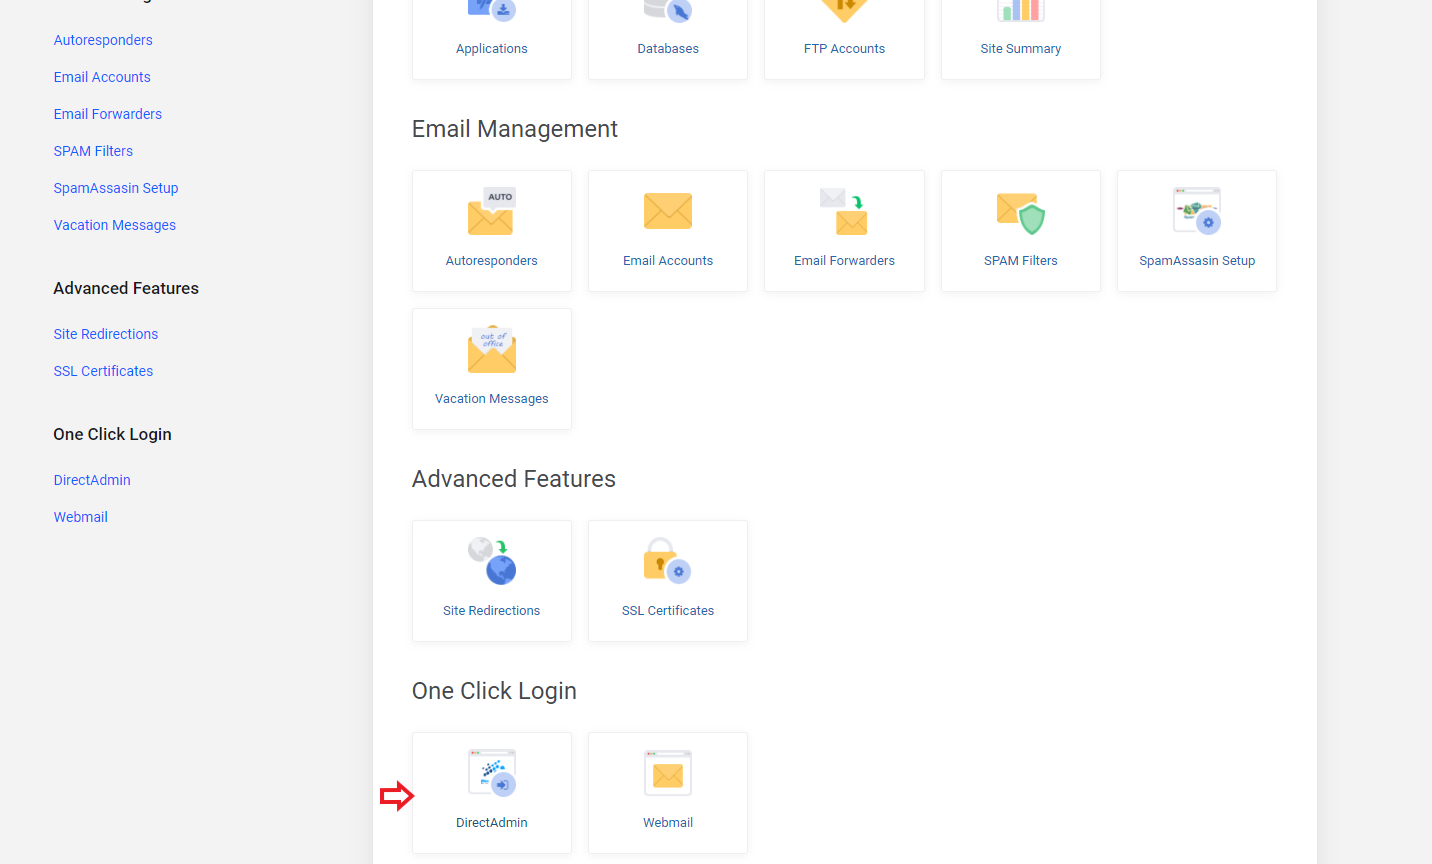
When logged in proceed to Direct Admin login underneath “One Click Login“ and click on the Direct Admin button. This will take you to a page that will lead you to start building your new dream website.
Step 5:
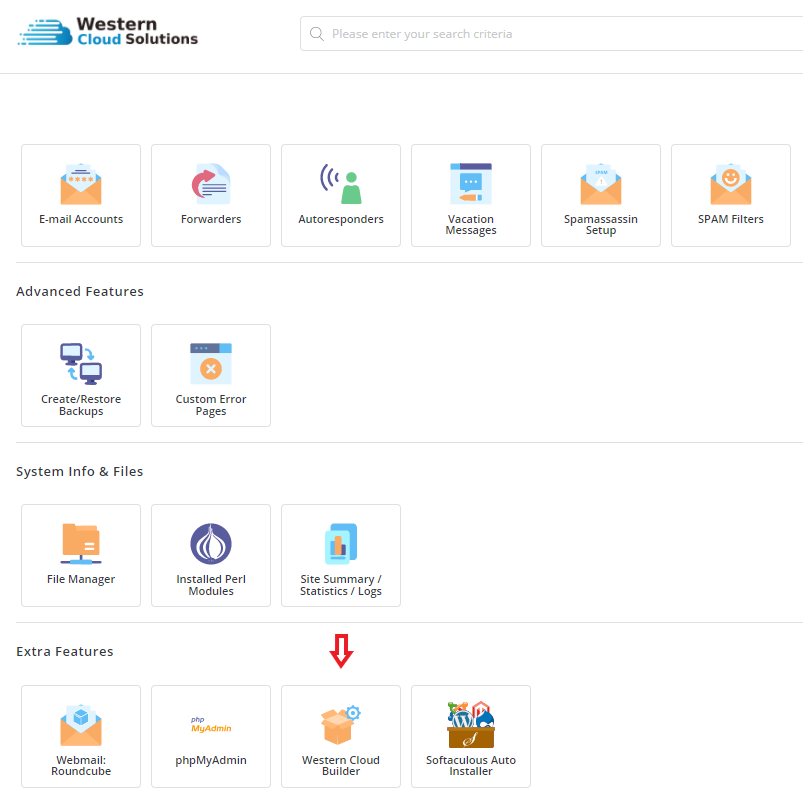
You will then be introduced to the back-end of your portal. Don’t be discouraged I will help you through every step. Proceed to scroll down, you are going to find “Western Cloud Builder” underneath “Extra Features”. Click on the “Western Cloud Builder” and proceed to the next step.
Step 6:
You will be introduced to our Western Cloud Builder where you are going to click create a new site.

Step 7:
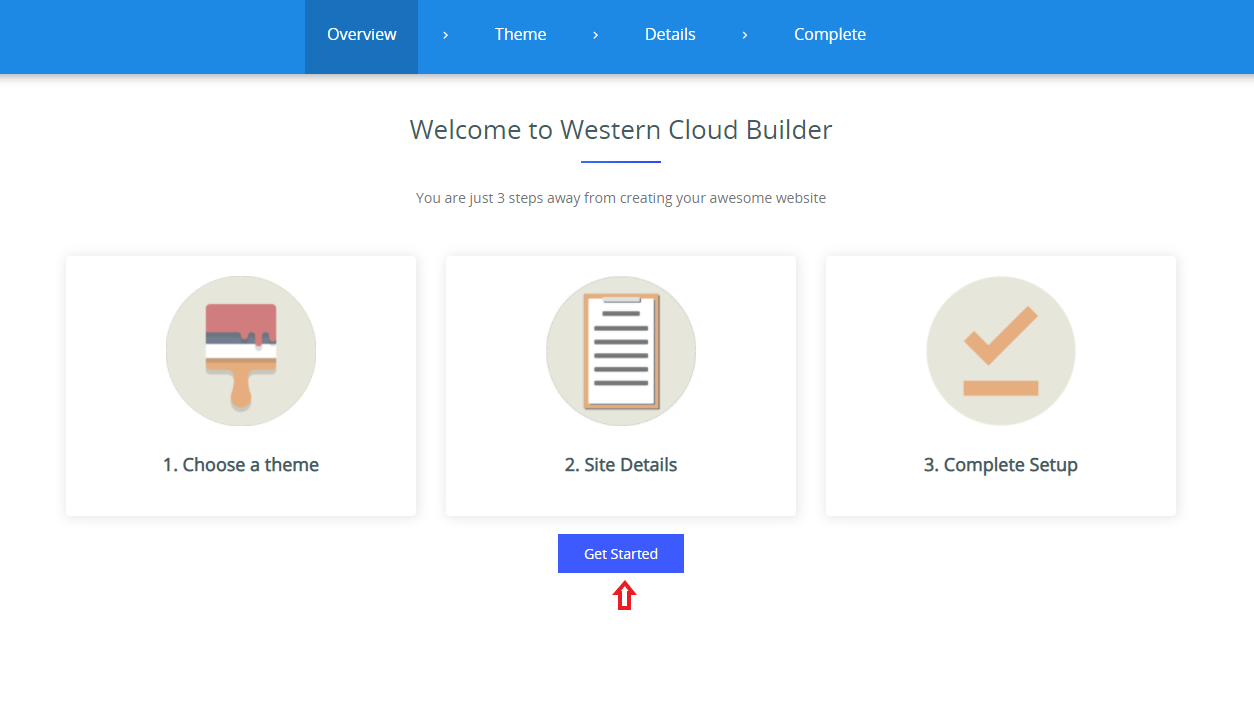
You will then be introduced to the 3 steps you are going to follow to get your website up and running. Proceed to click on the “Get Started” button.
Step 8:
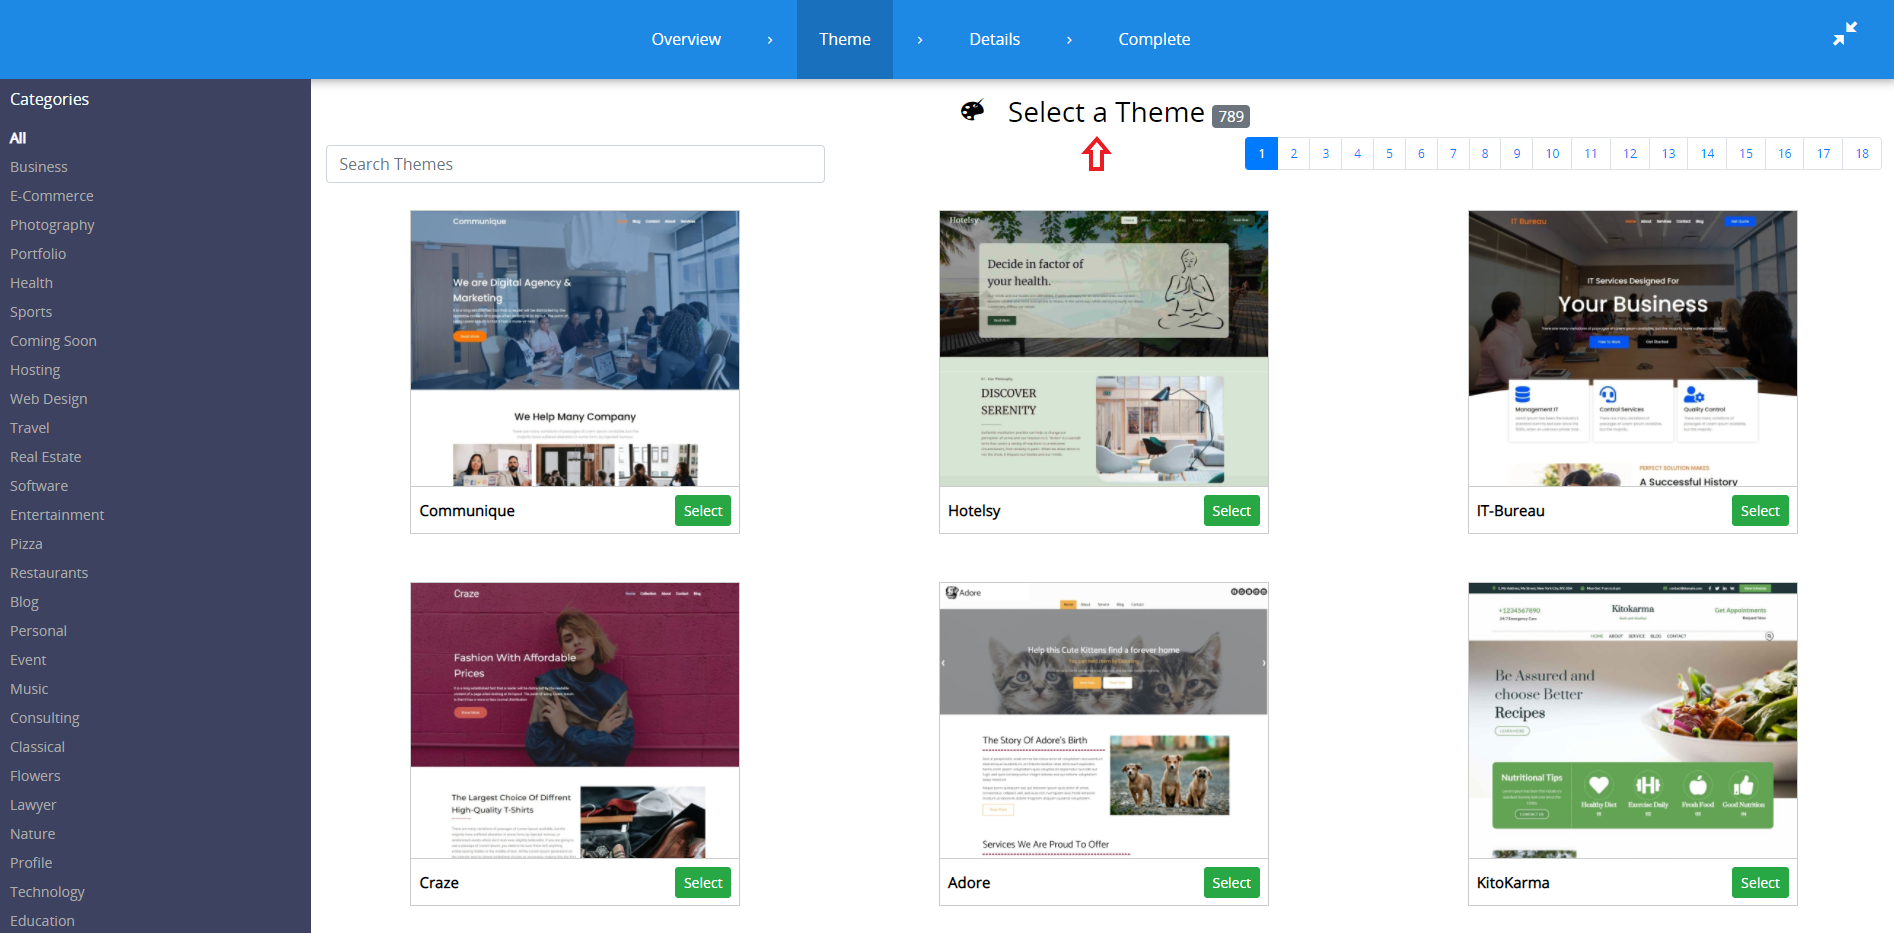
You will then be able to choose a theme of your liking or what you envision your website to be. There are a lot of options to choose from so don’t worry you will find the perfect one that fits you.
Step 9:
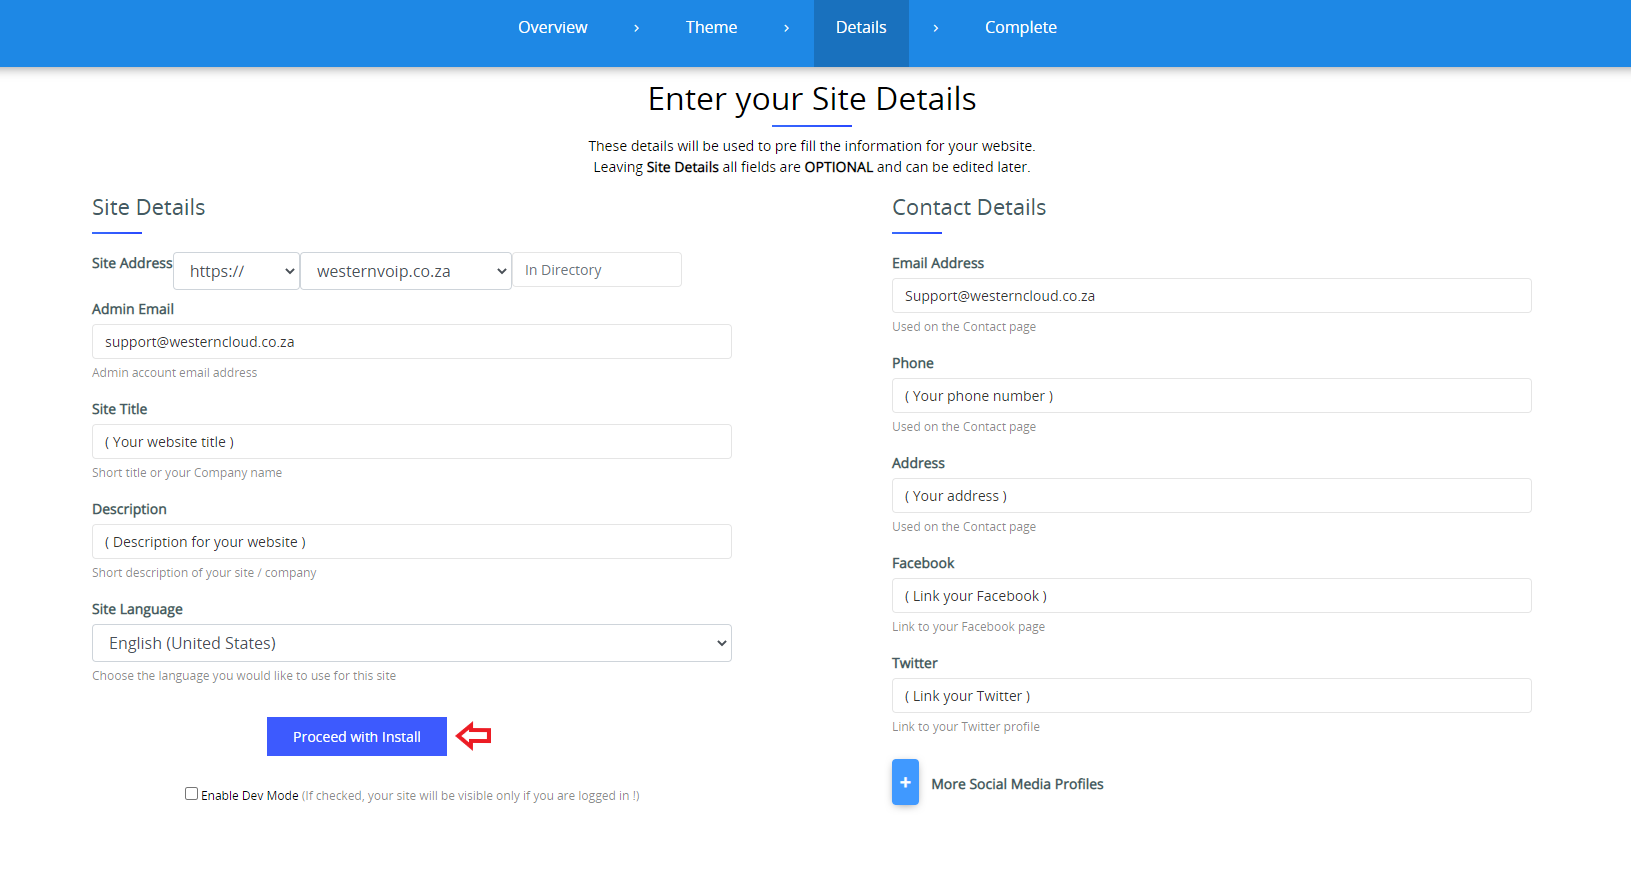
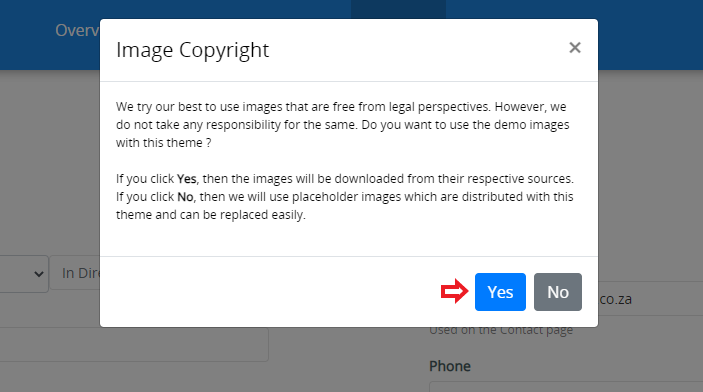
When you have found the perfect theme that will fit you best, you will need to fill in all of your details below, Take your time here and make sure the correct details are in every field. When you are all done with entering your details click on the “Proceed with Install” button, you will then be prompted with an "Image Copyright" popup just click yes and proceed.
Step 10:
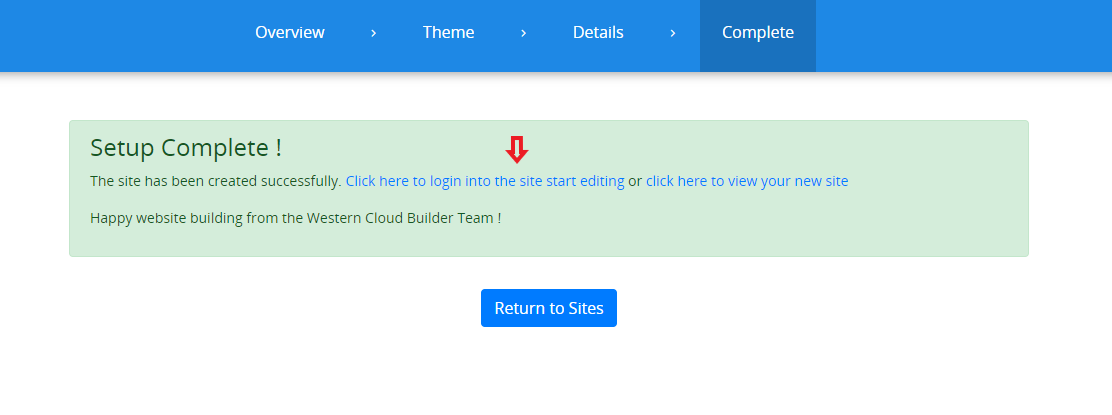
Well done your install is done, that was fast right. Now you can just click on the link saying “Click here to login into the site start editing”. You're almost there.
Step 11:
You can view all your website pages under the “Pages” section. Now you are able to edit every single page of your website and delete some you don’t need. Time for the fun to begin, We hope you enjoy your new quick and easy website builder.


